Vehicle Pre-purchase Inspection
Everything You Need to Know
download Full Article (PDF)
Auto pre-purchase and safety inspections are absolutely crucial when considering buying a used car. It is your critical safeguard, protecting you from purchasing a vehicle that could be fraught with hidden problems or costly repairs down the line. Without a thorough inspection, you're essentially gambling, risking your safety and potentially incurring significant financial burdens.
Furthermore, an auto pre-purchase inspection can empower you as a buyer, providing leverage in negotiations, helping you secure a fair price, and preventing any surprises after the transaction. It is not just a precaution; it's a wise investment strategy in the automotive marketplace. It confirms the integrity of your purchase and instills confidence that the vehicle is in the condition promised by the seller.
Skipping this step can be a costly mistake. Ensure peace of mind by making an auto pre-purchase and safety inspection an indispensable part of your vehicle acquisition process.
Here's a checklist to guide you:
- Battery
- Belts and Hoses
- Brakes
- Engine Condition
- Exhaust System
- Suspension and Steering
- Tires
- Transmission
- Vehicle History Report
Battery Inspection
The battery is how you start the vehicle and power various electrical systems. The inspection should involve assessing the battery's physical condition, voltage, and overall performance. What should you look for?
- Visual Inspection:
- Check for any physical defects such as cracks in the battery case.
- Inspect the battery terminals for corrosion, dirt, and loose connections.
- Look for signs of leakage or mineral build-up around the terminals.
- Fluid Level Check:
- Engine Oil: Check oil level and condition. If the oil is dark or gritty, it may need to be changed.
- Spark Plugs and Ignition System:
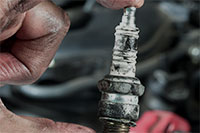
- Inspect Spark Plugs: Check for wear and carbon build-up. Replace spark plugs if they are worn out or fouled.
- Check Ignition Wires: Inspect the ignition wires for cracks or wear.
- Start the Engine: Listen for any unusual noises such as knocks or rattles which could indicate internal problems.
- Idle and Rev Test: Check how the engine idles and responds to acceleration. Rough idling or hesitation during acceleration can indicate issues with fuel delivery or ignition.
- Compression Test:
- This test helps assess the condition of the engine’s valves, valve seats, and piston rings and whether these components are wearing evenly.
- Diagnostic Scan:
- Use scanner to check for any engine-related error codes which can help pinpoint specific issues needing attention.
Belts and Hoses Inspection
Belts and hoses play crucial roles in powering various vehicle components and maintaining essential functions. What should you look for?
- Visual Inspection of Belts:
- Check for Wear and Tear: Look for signs of fraying, cracking, or glazing on the belts. These can indicate that the belt is aging and may need replacement.
- Check Tension: Press down on the belt; typically, it should have about half an inch of give. If it’s too loose or too tight, it may need adjustment or replacement.
- Look for Contamination: Oil or other fluids on the belt can cause it to slip or degrade faster.
- Visual Inspection of Hoses:
- Check for Leaks: Look for any signs of coolant or other fluid leaks along the hose, especially near the connections.
- Inspect for Brittleness or Softening: Squeeze the hoses with your hand. They should feel firm but flexible. If they are hard and brittle or feel overly soft, they may be deteriorating
- Look for Bulges or Swelling: This can be a sign that the hose is under undue stress or close to failing.
- Check for Cracks: Surface cracks can lead to deep cracks and eventually hose failure.
- Check Hose Clamps and Connections:
- Tightness: Ensure all clamps and connections are secure and not corroded.
- Adjustment: Loose clamps might need tightening to ensure a secure fit and prevent leaks.
- Listen for Noises:
- Start the Engine: Listen for any squealing or chirping noises when the engine is running, which may indicate a loose or worn belt.
- Check Pulleys and Tensioners:
- Inspect Pulleys: Ensure they are not misaligned, wobbly, or showing signs of wear.
- Check Tensioners: They should maintain proper tension and not be stuck or overly loose.
- Check for Alignment:
- Belt Alignment: Make sure the belts run straight over the pulleys. Misalignment can cause wear and premature failure.
- Testing System Performance:
- Check Systems Powered by Belts: For example, with the A/C on, check for changes in cabin temperature to confirm the compressor belt is functioning.
- Monitor Temperature Gauge: While running the engine, monitor the temperature gauge to ensure that the cooling system (hoses and radiator) is functioning correctly without overheating.
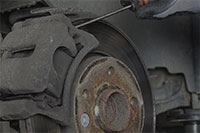
Brake System Inspection
The brake system is a fundamental aspect of your safety and drivability. So, what should you look for?
- Visual Inspection of Brake Pads and Shoes:
- Check for Thickness: Measure the remaining thickness of the brake pads and shoes. Most vehicles have a minimum thickness requirement. If the pads or shoes are below this limit, they need to be replaced.
- Look for Uneven Wear: Uneven wear can indicate issues with the caliper or the brake hardware.
- Inspect Brake Discs/Rotors:
- Check for Wear and Grooves: Look at the surface of the discs for scoring, grooves, or roughness. Excessive wear or deep grooves require resurfacing or replacement.
- Measure Rotor Thickness: Use a micrometer to measure the rotor thickness against the manufacturer’s minimum specifications. Replace if below minimum specs.
- Inspect Brake Drums (if applicable):
- Check for Cracks and Damage: Inspect the drums for any cracks or damage. Look for signs of overheating, such as blue coloring.
- Check Brake Fluid:
- Fluid Level: Check the brake fluid level in the reservoir. If low, it may indicate a leak or that the brakes are worn.
- Fluid Condition: Look at the color of the brake fluid. Dark, dirty fluid needs to be replaced and the system possibly flushed.
- Inspect Brake Lines and Hoses:
- Look for Leaks and Cracks: Inspect all lines and hoses for signs of wear, leaks, or damage. Ensure that there are no kinks that could impede fluid flow.
- Check for Brittleness or Swelling: Hoses should not be brittle or swollen.
- Check Brake Calipers and Wheel Cylinders:
- Inspect for Leaks and Movement: Ensure that calipers and cylinders are not leaking and slide freely on their mounts.
- Test Brake Functionality:
- Pedal Feel: Check the brake pedal feel. It should not feel spongy or sink to the floor. Sponginess can indicate air in the hydraulic system.
- Parking Brake: Test the parking brake to ensure it holds the vehicle effectively and releases completely.
- Road Test:
- Performance Check: During a road test, listen for any unusual noises. Check for pulling to one side when brakes are applied, which could indicate a stuck caliper or collapsed brake hose.
- Brake Response: Ensure that the brakes do not vibrate or shudder when applied, which could point to warped rotors.
- Inspect ABS System (if equipped):
- Check Warning Lights: Ensure the ABS light functions correctly and turns off after the vehicle starts.
- Sensor and Wiring Inspection: Check the ABS sensors and wiring for damage or dirt buildup that could interfere with operation.
Engine Condition Inspection
No extra words are needed here. This one is a must. Here's what to look for.
- Visual Inspection:
- Check for Oil Leaks: Inspect the engine block, oil pan, gaskets, and seals for signs of oil leakage.
- Inspect Mounts: Check engine mounts for excessive wear, cracks, or breakage that could lead to engine instability.
- Inspect the undercarriage for any signs of rust or damage, especially around the engine area.
- Fluid Level Check:
- Engine Oil: Check oil level and condition. If the oil is dark or gritty, it may need to be changed.
- Spark Plugs and Ignition System:
- Inspect Spark Plugs: Check for wear and carbon build-up. Replace spark plugs if they are worn out or fouled.
- Check Ignition Wires: Inspect the ignition wires for cracks or wear.
- Start the Engine: Listen for any unusual noises such as knocks or rattles which could indicate internal problems.
- Idle and Rev Test: Check how the engine idles and responds to acceleration. Rough idling or hesitation during acceleration can indicate issues with fuel delivery or ignition.
- Compression Test:
- This test helps assess the condition of the engine’s valves, valve seats, and piston rings and whether these components are wearing evenly.
- Diagnostic Scan:
- Use scanner to check for any engine-related error codes which can help pinpoint specific issues needing attention.
Exhaust System Examination
The exhaust system is a vital component for vehicle performance and emissions control. Addressing exhaust system issues early on prevents safety hazards, reduces emissions, and ensures compliance with environmental regulations. So, what should you look for?
- Visual Inspection:
- Check for Rust and Corrosion: Inspect the entire length of the exhaust system, including the muffler, pipes, and catalytic converter, for signs of rust or corrosion, which could lead to leaks.
- Look for Physical Damage: Check for dents, holes, or cracks in the exhaust components that could impair the system's integrity or cause leaks.
- Observe the exhaust smoke; excessive or unusually colored smoke can indicate problems within the exhaust system or engine.
- Inspect Exhaust Mounts and Hangers:
- Check for Wear and Damage: Ensure that all mounts and hangers are intact and securely holding the exhaust components in place. Damaged or worn mounts can lead to excessive movement and stress on the exhaust system, causing premature failure.
- Examine the Catalytic Converter:
- Check for Blockages or Damage: The catalytic converter is crucial for reducing emissions. Check for any signs of physical damage or clogging. A clogged catalytic converter can lead to reduced engine performance and increased emissions.
- Test for Functionality: On some vehicles, you can perform back-pressure tests to assess if the catalytic converter is obstructed.
- Inspect the Oxygen Sensors:
- Sensor Condition: Check the condition of the oxygen sensors, which are critical for the engine management system to fine-tune the air-fuel mixture and manage emissions effectively.
- Diagnostic Check: Use an OBD-II scanner to read any fault codes related to the oxygen sensors and ensure they are operating within the manufacturer’s specifications.
- Muffler Inspection:
- Check for Holes or Rust: Inspect the muffler for any signs of holes, rust, or corrosion, which could affect noise suppression and emissions control.
- Internal Damage: Listen for rattling sounds from the muffler, which may indicate internal baffles have become detached or corroded.
- Check Pipe Connections and Joints:
- Inspect Seals and Gaskets: Ensure all connections and joints in the exhaust system are sealed properly to prevent leaks. This includes checking for worn or failing gaskets and flange seals.
- Road Test:
- Monitor Performance and Noise: During a road test, pay attention to the overall performance of the vehicle and listen for any unusual exhaust noise, which might indicate a leak or obstruction in the exhaust system.
Suspension and Steering Evaluation
The suspension system, responsible for vehicle stability and ride comfort, and the steering system. So, should you look for?
- Visual Inspection:
- Check for Wear and Damage: Inspect all visible parts of the suspension system including shocks, struts, springs, and mounting hardware for signs of wear, damage, or corrosion.
- Inspect Steering Components: Look at tie rods, rack and pinion, steering box, and other steering components for wear, looseness, or damage.
- Check for Leaks:
- Shocks and Struts: Look for signs of oil seepage or heavy wetness around the shock absorbers and struts. This can indicate a leak which may affect their performance.
- Bushings and Joints:
- Inspect Bushings: Check rubber bushings for cracking, hardening, or crumbling.
- Ball Joints and Tie Rod Ends: Check for play or looseness in these joints. They should not move excessively when pried with a suitable tool.
- Suspension Travel and Spring Condition:
- Test Suspension Travel: Bounce each corner of the vehicle to check the suspension travel. The vehicle should rebound once and settle, without continuing to bounce.
- Inspect Springs: Look for broken or sagging springs which can affect vehicle height and alignment.
- Wheel Bearings:
- Check Wheel Bearings: Rotate the tires by hand, listening for grinding or grating noises. Also, check for excessive play when you wiggle the wheel from the top and bottom.
- Steering System Operation:
- Check Steering Fluid: Look at the power steering fluid level and condition. Low or dirty fluid can indicate a leak or that it's time for a change.
- Test Steering Response: While driving, the steering should be responsive without delay or play. Note any vibrations or difficulty in turning the wheel.
- Alignment Check:
- Inspect Wheel Alignment: Misalignment can cause uneven tire wear and poor handling. Check the tires for uneven wear patterns that may suggest alignment issues.
- Steering Rack and Power Steering Pump:
- Inspect for Leaks and Operation: Check the steering rack and power steering pump for any signs of leaks.
- Operational Check: Ensure there is no whining sound when turning the steering at idle, which can indicate power steering pump issues.
- Tire Inspection:
- Check Tire Pressure and Condition: Ensure all tires are properly inflated and inspect for any signs of uneven wear, which can be caused by suspension issues.
Tire Inspection
The tires are your vehicle’s safety, performance, and comfort. So, what should you look for?
- Tread Depth Check:
- Use a Tread Depth Gauge: Measure the tread depth in several places on each tire to ensure it is above the legal minimum.
- Visual Inspection: Look for any signs of uneven wear, such as high and low areas or excessively worn edges, which could indicate alignment issues.
- Inspect for Damage:
- Look for Punctures, Cuts, and Gouges: Inspect the tire surfaces for sharp objects, cuts, punctures, or other damages that might lead to air leaks or blowouts.
- Sidewall Inspection: Check the sidewalls for bulges, gouges, or other deformities. Sidewall damage can compromise tire integrity and is usually irreparable.
- Check Tire Pressure:
- Use a Reliable Tire Pressure Gauge: Check the air pressure in all tires, including the spare, and adjust it according to the vehicle manufacturer’s recommendations. Proper tire pressure is essential for optimal tire performance, fuel efficiency, and safety.
- Inspect Valve Stems: Ensure valve stems are not damaged, cracked, or leaking.
- Tire Age:
- Check the Manufacture Date: Look at the tire sidewall for a four-digit code that indicates the week and year the tire was made (e.g., 3219 for the 32nd week of 2019). Tires that are older than 5-6 years should be inspected professionally to determine if they need replacing due to age, regardless of tread depth.
- Check Tire Rotation and Alignment:
- Rotation Check: Ensure tires are rotated according to the vehicle manufacturer’s recommended schedule or every 10,000 to 12,000 km. Regular rotation helps achieve uniform wear and extends tire life.
- Alignment Check: Observe if the vehicle pulls to one side or if the steering wheel vibrates, which could indicate an alignment issue.
- Inspect Wheel Balance:
- Check for Vibration: During a test drive, note any unusual vibrations, which may suggest that the tires need to be balanced. Proper balance is essential for smooth driving and even tire wear.
Transmission Inspection
The transmission plays a crucial role in the vehicle's overall performance and drivability. A well-executed inspection entails smooth gear shifts, responsiveness, and seamless transitions across various speeds. So, what should you look for?
- Fluid Check:
- Check Fluid Level and Condition: Use the dipstick to check the transmission fluid level when the vehicle is at operating temperature and running. The fluid should be at the full mark on the dipstick and should be a bright red color. Dark or burnt-smelling fluid indicates a problem.
- Check for Leaks: Inspect the area around the transmission for any signs of leaks. Common spots include the transmission fluid pan, lines, and seals.
- Inspect the Transmission Pan:
- Remove and Inspect: If performing a more thorough inspection or service, remove the transmission pan to check for metal shavings or other debris, which can indicate internal wear or damage.
- Test Drive:
- Monitor Performance: During a test drive, pay attention to how the transmission shifts between gears. Shifts should be smooth and effortless without any delay or strange noises.
- Check for Slippage: Feel for any slippage when the transmission shifts. Slippage occurs when the engine speeds up, but the vehicle does not accelerate as expected.
- Check Transmission Computer:
- Diagnostic Scan: Use a diagnostic tool to check for any codes stored in the vehicle's computer system that can indicate transmission issues.
- Inspect External Components:
- Hoses and Lines: Check all transmission hoses and lines for any signs of wear, leaks, or damage.
- Cooler Lines: Inspect the transmission cooler lines for blockages or leaks, which can affect transmission fluid cooling.
- Clutch Operation (for manual transmissions):
- Clutch Feel and Engagement: Check the clutch pedal for proper tension and feel. The clutch should engage and disengage smoothly without any grinding noises.
- Shift Linkage and Cables (for manual and automatic transmissions):
- Inspect and Adjust: Check the linkage and cables for proper adjustment and wear. Ensure that all movements are smooth and that the transmission stays securely in the selected gear.
- Torque Converter (for automatic transmissions):
- Check for Noise and Function: Listen for any unusual noises from the torque converter area when driving or shifting. Problems with the torque converter can lead to poor acceleration and decreased power.
- Transmission Mounts:
- Inspect Mounts: Check the transmission mounts for any wear, cracks, or breakage. Worn mounts can lead to excessive movement and misalignment.
- Undercarriage Inspection:
- Inspect for Damage: Look at the undercarriage for any signs of impact or damage that could affect the transmission.
Vehicle History Report
Skipping a Vehicle History Report is like gambling with your money and safety. It is absolutely essential when purchasing a used vehicle. It serves as a critical, non-negotiable document that reveals the backstory of a car. Here's why it's imperative:
- Uncover Hidden Damage: The report can reveal serious issues that are not visible during a standard inspection, such as flood damage, frame damage from accidents, or undisclosed mechanical problems. These can drastically affect the car’s performance, safety, and longevity.
- Verify Mileage Accuracy: Odometer fraud is a real concern. A Vehicle History Report helps confirm whether the mileage shown is accurate or if it has been tampered with, which can significantly impact the value and expected life of the vehicle.
- Identify Title Problems: The report provides details on the title status, including any salvage titles, rebuilt titles, or other encumbrances that severely affect the car's legality and safety. Knowing the title status helps you avoid buying a vehicle that could be a legal nightmare.
- Accident History: Knowing if the vehicle has been in any accidents informs you about potential future problems. Even minor accidents can have long-term effects on vehicle integrity.
- Insurance and Warranty Claims: The report can indicate if the car was subject to major insurance claims or required significant warranty repairs. This could signal chronic vehicle issues or past significant damage.
- Ownership Timeline: It provides a timeline of previous ownership, how long each owner had the vehicle, and in which states it was registered. Frequent changes in ownership or registration across multiple states might be red flags.
Both, ICBC and CarFax can provide you with the vehicle history report.
- https://www.carfax.ca
- https://www.icbc.com/vehicle-registration/buy-vehicle/buy-a-used-vehicle/Vehicle-history-reports
We hope you find this guide helpful. Again, if you’re in the Vernon, BC area and would like our help with a used vehicle inspection, give us a shout or stop by.


